Wednesday, January 26, 2011

New Arrivals! French Market Royal Crown Embroidered Hand Towel and Napkins

Bonjour my lovlies!!
I woke up this morning to a ton of snow...and guess what? It is still snowing out & supposed to again for the next 4 days!
I am not sure how much more I can take of this winter. It seems to snow every week & I haven't seen the ground since early December.
On a positive note I know spring is just around the corner so i've been busy creating new designs just for that :)

Of course you all know that I love the old & new combined into a modern twist in addition to keeping my collections consistent so that everything in my shoppe flows nicely together.

Meet my newest items!


How chic are these!!! I love how the napkins work with my crown embossed dishware & how the towel gives my modern black & white bathroom a girly touch!
I still have lots more to come guys & gals! Monograms & other designs to compliment my other home decor items.

Til then, stay warm & happy decorating!!
xoxoxo,
Renee'


Friday, January 14, 2011

New French Market Arrivals - Indoor Herb Gardens & Breakfast Serving Trays

Happy Friday & Bonjour my lovelies!!!
I must say I am so done & tired of the cold winter we're having here. The 5-foot snowstorm we had 2 weeks ago has still yet to melt & on top of it we had another snowstorm a few days ago....so guess what? I have spring on my mind in my new designs & creations.
I have kept a journal of all my ideas and am finally able to put in some time to work on them after a very busy holiday season.

I love adding organic herbs in practially all of my dishes I make so I decided to make an indoor herb garden...which can also be used for flowers or moss balls. I use French Basil like it's going out of style lol, so I grabbed some organic potted herbs & went to town playing off my most sought after designs & ta da!!
I have a french royal crown, queen bee, le fleur de lis and paris hotel les etoiles design.


Custom designs & even monogram designs are also available for custom order purchase. Please convo me for details :)

The fun for me didnt stop there though. I also decided to create adorable matching galvanized tin huge raw silver breakfast serving trays in the Paris Hotel Les Etoiles and Royal Crown Designs. Custom designs can also be accomidated.


And that was all I could fit in today with all the orders i'm trying to fill but I promise you I have soooooo much more new stuff to come.
Stay warm & happy crafting & designing
xoxox,
Renee'

Saturday, January 1, 2011

Happy New Year!!

Bonjour & Happy New Year Everyone!!

I am happy to be back!! We had the most terrible 5-foot snowstorm here & were stuck in for a week without access to anything! The entire town was closed, plows broke down & everyone's back was hurting from shoveling. It was a complete mess.

So I am finally getting back to work YAY!!! Orders will resume shipping on 1/3/11. I have a lot of catching up to do with being shut down.

I just wanted to wish everyone a Happy New Year!!

Lot's of New Arrivals for 2011 :)
xoxoxo

Saturday, November 6, 2010

Glass Paperweights ARE Back & BIGGER & BETTER THEN EVER!!

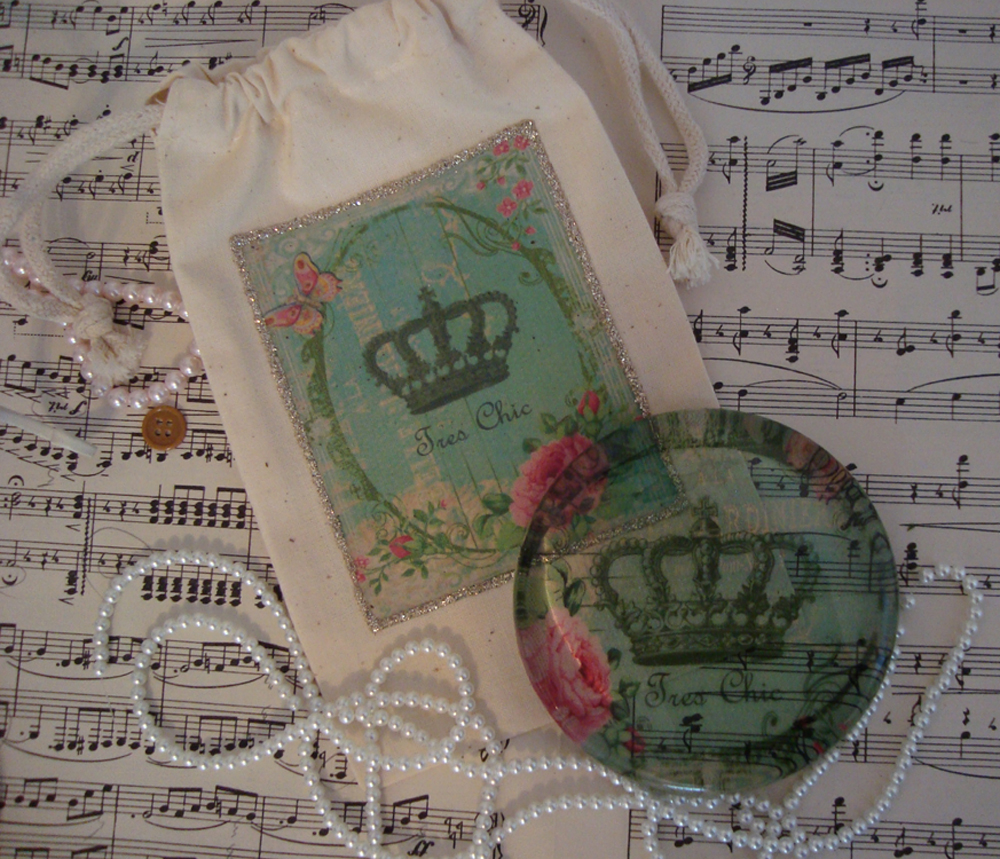
HUGE Tres Chic Crown Shabby Rose Glass Paperweight with Matching Muslin Drawstring Bag

My paperweights are FINALLY back in stock, however I have been working on these for months to bring in a truly OOAK creation.
You will not find these anywhere else. My own recipe and design. I promise you will be 100% pleased with the quality & details on this piece.

*DETAILS*

Paperweight is HUGE! Clear glass measures approx 4" Diameter x 1" thick & weighs approx 11 oz. Will certainly hold down a stack of papers.

The design on the paperweight is truly gorgeous & pops brilliantly! A shabby chic green and rose hue background features a royal crown surrounded by butterflies & roses with the words "Tres Chic"

What makes this design & my recipe so unique besides the size is the design. The image is made irridescent in a way that it will ALWAYS appear, however whatever you place the paperweight over will show through. I tried to emphasize this beautiful piece of art by placing it on various objects.

*WHAT'S INCLUDED*

Listing includes 1 HUGE Glass Paperweight & a drawstring muslin bag with matching image of the paperweight covered in silver german glass glitter!

---------------------------------------------------------
This is certainly a conversation piece & is so large it can also be used as a coaster. The image is permanent, not stamped. It's a secret but it will not come off ever.

Make's a great gift.

Interested in custom pieces? Please convo with me. I have done a gorgeous custom piece as favors for a client which are shown below underneath the shabby tres chic rose design.

Design & Recipe Patent Pending Copyright Royal Bebe Shoppe!

More designs will be posted soon!


And this is a custom order I completed for a tres fabulous client which are to be given out as favors at her thanksgiving dinner this year at her French Castle!


xoxo,
Renee'


Tuesday, October 26, 2010

New Arrival! HUGE 18" Shabby Marie Antoinette Let them eat Cake Envelope Style Pillow Cover!

Bonjour my sweet customers & friends!
I have been MIA from my blog for the past few weeks as i've been extremely busy filling orders & battling a terrible sinus infection.

One of my best sellers is my small oblong Marie Antoinette Pillow, so i've decided to add a Huge 18" Square Marie Antoinette "Let them Eat Cake" Envelope style Pillow cover to my collection.

She is ABSOLUTELY Gorgeous! Her crisp image was designed by me & printed onto high quality medium weight cotton poplin with a gorgeous oatmeal linen backside which is an envelope style closure.
Her choker has been adorned with a large clear rhinestone & the Cake has been embellished with loads of silver german glass glitter which will turn a patina color over time.
Perfect for a shabby, chic, french style decor home.

Here she is :) She can be purchased at my store: http://www.royalbebeshoppe.etsy.com/

Ooooh lala!!


Gorgeous Silver German Glass Glitter adorned Cake!!


Rhinestone Choker....nothing but the best for Marie!


Coordinates with my other shabby pillows, plaques & decor!


xoxoxo,
Renee'

Sunday, October 3, 2010

DIY French Tufted Headboard without Wood Tutorial under $100

So...I am always trying to find the most unconventional way to use items that one would typically throw in the trash. I needed to make a french tufted headboard for my paris french market themed bedroom, so I thought instead of using plywood...how about using those huge double wall cardboard boxes I have saved from when I last moved.

Here she is! .....and here is the tutorial to make your own. This project will cost under $100 (and may be a lot less depending on the fabric you're able to get a great price on) and took be about 6 hours from start to finish


Supplies Needed:
    1 Large Double Wall Cardboard Box (*you may use plywood instead)
    Masking Tape
    Needle Nose Plyers
    Scissors
    Yarn Needle
    Embroidery Thread
    2" Thick batting by the yard (*you may use foam which is more money)
    Pins
    Staple Gun w/ staples
    Elmers Craft Bond Adhesive Spray
    Command Heavy Duty Hanging Strips
    Button making kit (*Use the plastic kit if you're using upholstery/thick fabric)
    Hammer
    Tape Measurer
    Level
    Black Sharpie Marker
    Fabric (*for queen bed, I used 2 yards of fabric 58" wide)

Let's get started!

First prepare your cardboard. Measure the size of headboard you want. For a queen size bed I made mine about 54" wide & approx 48" high.

Step 1: Lay out your cardboard. If you have multiple pieces or openings of box flaps, use the masking tape & wrap around several times to get a strong hold.


Step 2: Create your top design. For my design, I wanted a simple french design. I used a sharpie to draw the design, cut it out with scissors & used that cut out piece as a template to mark the opposite top side & cut it out.


Step 3: Using your black sharpie & a tape measurer, mark the cardboard where you want to have the buttons placed which will be the tufted part of the headboard. I measured mine 3" down from the top and all the remaining were 10" apart.


Step 4: Using your needle nose plyers poke holes through the cardboard in each spot that you marked for the buttons ensuring they go through to the other side.


Step 5: Now start laying out your 2" think batting or foam onto the board. Spray the craft bond adhesive to the batting & place it onto the board. To get a secure hold walk barefoot across all of the batting to add weight.


Step 6: Lay out your fabric over the batting allowing enough to hang over the edges so when it is flipped it can be stapled to the backside. (*I used a gorgeous upholstery grade soft chenille type camel linen fabric, purchased from Joann Fabrics)


Step 7: Pin around the perimeter to secure your fabric to the foam once you've smoothed out all wrinkles so when you flip over you can staple without the fabric moving out of place.


Step 8: Flip over the board & start pulling & stapling the fabric securely to the backside. Because you're using cardboard you will need to over staple. I stapled 3 staples high & stapled about 2" apart.


Step 9: Using the excess fabric use your purchased fabric button kit to make the buttons. The metal ones are more difficult than the plastic ones if you're using thicker fabric. I used a hammer with the kit to properly snap the button into place.


Step 10: Using your embroidery yarn & yarn needle pull the thread through the back side of the headboard where you made your holes. Pull through the button & thread through one more time. Holding the thread tightly from the backside triple knot tightly. I had some challenges making the tufts with cardboard as I didn't have the luxury of a nail head to securely wrap around, so I pulled the thread & stapled as I pulled tightly to the backside of the cardboard in a zig zag pattern.


Step 11: Using your needle nose head plyers make 3 holes into the backside of the cardboard about 8" down from the top. Place your command hook into the hole making sure the hook grabs inside the cardboard.


Step 12: Remove the adhesive backing on the command strips & secure the headboard to the wall using a level if you wish. I placed the bottom of my headboard at around the same spot where my box spring is so it is not flush on the ground so that I could make my headboard look higher.


And that is all! Here are some more pictures for inspiration of the finished piece. The french burlap, decorative pillows, crown pillowcases and paris french market duvet cover used in the photos are available for sale in my store http://www.royalbebeshoppe.etsy.com/
I would love to see your pictures if you decide to use my tutorial to make your own french style headboard.
xoxo, Renee'